For the last several years, there has been a concerted effort in the industrial manufacturing sector to replace metal parts with plastic ones where feasible. The reasons for this vary based on the application, but in general, it boils down to a rising demand for less expensive products without compromising quality. As a result, plastic parts have become integral to nearly every industry. When it comes to the plastic manufacturing process, it’s helpful for customers of plastic parts suppliers to understand the stages involved. Injection molding, specifically, is an efficient, multi-step process that many industries rely on for quick production of high-quality plastic components.
Step 1: The Preliminary Phases
The first stage of the plastic manufacturing process largely involves defining part specifications and design. This includes ensuring the part adheres to Design for Manufacturability principles, material selection, and establishing the complexity of the part.
Design for Manufacturability (DFM) involves optimizing the part for the plastic manufacturing process. In this case, specifically for the injection molding process. Part engineers consider factors like draft angles, wall thickness uniformity, and incorporate features like ribs or bosses to enhance structural integrity.
During this stage, manufacturers will also select materials that are best suited for the part and relevant application. Factors such as mechanical strength, thermal properties, and chemical resistance need to be balanced with availability and supply chain considerations in order to ensure high-quality parts can be produced within a set timeframe. This is also when you’ll want to decide on domestic overseas tooling, a choice that often depends on budgets, desired lead times, and other factors.
Step 2: Prototyping
Second (and sometimes simultaneously with stage one) the second stage of the injection molding plastic manufacturing process revolves around prototyping. The purpose of this stage is to create a mock-up of your part in order to validate the design, process parameters, and tooling before entering into full-scale production.
This stage is a critical step in the plastic manufacturing process. Not only can it help designers and engineers identify and address design or process issues early on, but it also provides manufacturers with the information they need to optimize your production and reduce lead times as much as possible.
Step 3: The Production Phase of the Plastic Manufacturing Process
Once the part, tooling, and process parameters have been validated, it’s time to move into large-scale production. The specifics of this can vary based on the specifics of your plastic components, but in general, production involves:
- Setting up the Mold on the Machine—This involves securely mounting the mold onto the injection molding machine’s platens and ensuring proper alignment. The machine’s settings, such as injection pressure, temperature, and cycle time are configured based on the requirements of the part and the characteristics of the chosen material.
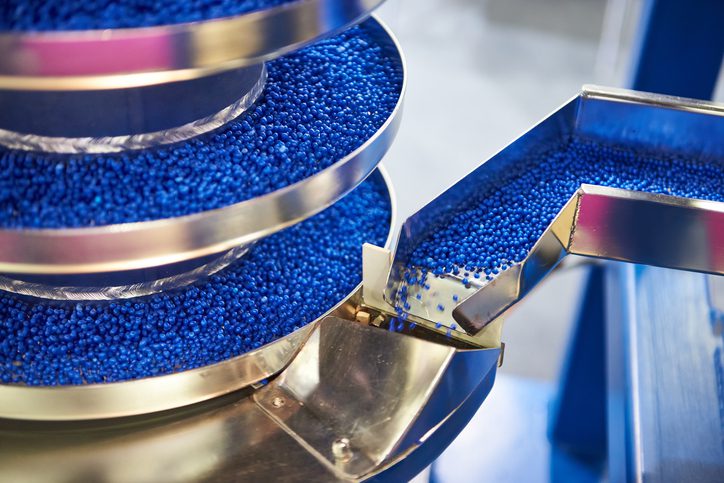
- Drying Resin (if Required) and Loading into the Hopper—Some plastic resins, particularly hygroscopic materials like nylon or PET, are prone to moisture absorption, which can negatively impact the quality of the molded parts. If this is the case, the resin pellets will need to be dried in a hopper dryer before being loaded into the machine’s hopper. This is essential to ensure uniform melting and consistent part quality.
- Injecting Molten Material into the Mold—Once set-up is complete, the injection molding machine begins the cycle by feeding the resin pellets into the machine’s barrel. Inside, the pellets are heated and melted, and then that molten material is injected into the mold cavity under high pressure.
- Cooling Time—After the mold is filled, the cooling process begins so that the plastic part can solidify into shape. Cooling time is carefully controlled to ensure proper solidification and minimize cycle time and prevent issues like warpage or shrinkage. This process can be accelerated via several methods, including cooling channels within the mold or external systems.
- Part Ejection—Once the part has solidified and cooled, the mold opens and the part is ejected from the mold. Ejection mechanisms, such as ejector pins and air blasts, are used to push the part out of the mold. Proper ejection ensures the part is cleanly released.
- Visual Inspection for Defects—After ejection, it’s important for the part to undergo visual inspection for defects such as surface imperfections, sink marks, flash, or dimensional inaccuracies.
Step 4: Secondary Operations and Post-Production
The final stage of the plastic manufacturing process is the post-production stage and secondary operations. During this stage, the injection molder will evaluate the manufacturing process to improve upon further iterations, if possible. And, if your manufacturing partner offers secondary operations, you can take advantage of other in-house capabilities such as drilling, tapping, machining, pad printing, assembly, surface finishes, final quality checks, and packaging and shipping.
Westec is Your Single Source Partner Throughout the Plastic Manufacturing Process
Founded in 1969, Westec Plastics is one of the only privately-owned and operated injection molding companies in the Bay Area. We offer injection molding services, in-house tooling and maintenance, and extensive secondary operations so we can deliver turnkey solutions for our customers in a range of industries. Connect with our team today to get started.